Hey girl, if you’ve ever tripped over a tangled mess of screwdrivers or lost your favorite drill in the garage chaos, you’re not alone – I’ve been there too many times. Tool storage DIY for beginners totally changed my game when I decided to tackle my hubby’s overflowing workbench last summer. It’s that simple fix that makes everything feel under control.
I put this together because I remember staring at our garage thinking, “How do I even start?” without fancy tools or skills. I tried a few easy hacks myself – like pegboards and jars – and boom, instant sanity. No more hunting for pliers mid-project; it was a total win for our little DIY adventures.
Stick with me through these 25 fun tool storage DIY for beginners ideas, and you’ll snag super easy setups you can whip up this weekend. You’ll walk away with fresh inspo tailored just for newbies like us. Promise it’ll feel doable and cute!
25 Tool Storage DIYs for Beginners That’ll Tame Your Garage Chaos
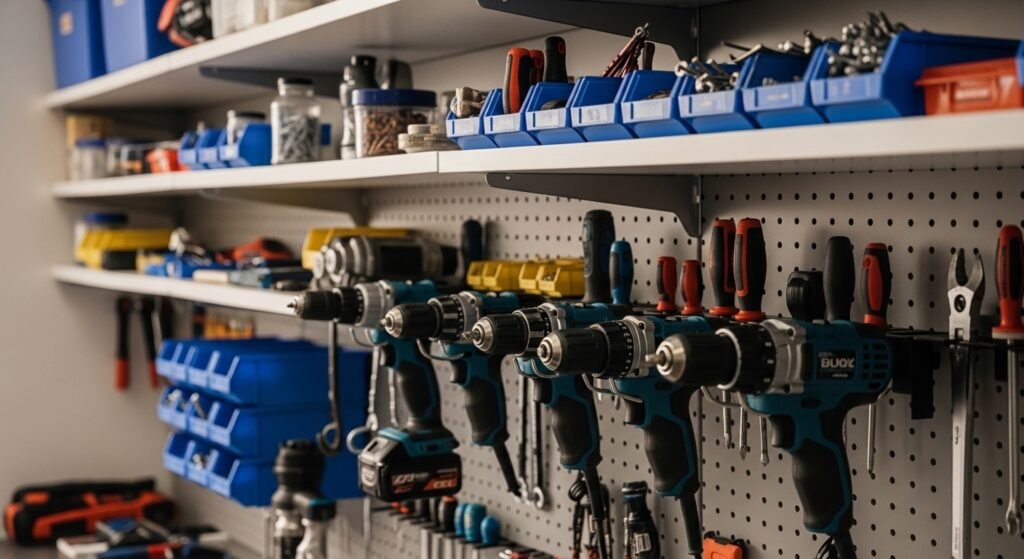
Wall-Mounted Drill Holders
This setup with drills neatly lined up on the wall is genius for quick grabs. I love how it uses simple hooks – super beginner-friendly. Mounted mine last month, and now my projects fly by without the dig-around frustration.
Hanging Tool Pegboard
Tools dangling perfectly organized? Yes please. Pegboards like this are cheap at hardware stores, and you can customize hooks in an afternoon. Total lifesaver for my garage refresh.
Shelved Tool Display
Pointing out the easy-reach shelves here makes me smile – no ladder needed. Great for smaller tools you use daily. I added one above my workbench; it’s like having a personal assistant.
Workbench Wall Organizer
That workbench with tools right behind it screams efficiency. Hang ’em with basic S-hooks, done. My version cut my setup time in half – you gotta try it.
Scissors Shelf Stack
Rows of scissors on slim shelves? Adorable and practical for crafty types. Use scrap wood for yours – mine holds shears and snips perfectly now.
Woodworking Tool Station
This active workspace vibe is inspiring for hands-on days. Simple racks keep chisels and planes handy. I recreated a mini version; feels pro without the hassle.
Mixed Tool Wall Rack
Every tool has its spot here – love the variety. Easy to DIY with plywood and nails. Hung one up, and my hubby was obsessed.
Screw Jar Shelves
Jars of screws above the bench? Game-changer for sorting bits. Grab mason jars from the kitchen – labeled mine with a Sharpie, zero cost. You won’t lose a screw again.
Garage Tool Pegs
Neatly hung tools make any wall functional. Pegs are forgiving for beginners – adjust as you go. My first try looked this good, swear.
Heavy-Duty Garage Shelves
Filled shelves like this handle the big stuff easily. Bolt-on units from big box stores work great. Stacked ours floor-to-ceiling; garage feels huge now.
Electrical Parts Bins
Organized wires and plugs in clear bins – no more tangles. Plastic ones snap together fast. Perfect for my holiday light storage hack too.
Plywood Drawer Workbench
Clean white drawers under plywood top? So fresh. Built mine with leftover boards – held up through three projects already.
Wall Tool Rack
This rack overflows with tools but stays tidy. Mount with brackets; takes 20 minutes. I added one by the door – grab and go.
Pegboard Workbench Front
Pegboard right at the bench level is smart. Hooks for pliers and hammers galore. My setup matches this; saves counter space daily.
Pipe Hanging Storage
Grey pipes on the wall for bulky items – clever reuse. PVC from the plumbing aisle works. Hung my hoses this way; no more floor piles.
Open Wood Tool Shelves
Doorless shelves keep everything visible. Stack crates if you’re low on skills. Ours look rustic-cool now.
Drawer Tool Organizer
Drawer packed smartly on the table – portable win. Foam inserts divide it perfectly. I made one for bits; fits in my toolbox.
Shelf Drill Lineup
Drills and drivers shelved neatly. Wire baskets do the trick cheap. Remember when I dropped mine everywhere? Not anymore.
Pin and Needle Board
Sewing pins next to the machine – crafty tool storage twist. Corkboard works for small bits too. My sewing corner thanks me.
Wrench Wall Rack
Wrenches in a row with extra rack below. French cleats make it adjustable. Hung my set; feels like a shop now.
Wooden Shelf Drawers
Shelves plus drawers packed with tools – max storage. Build with 2x4s easy. Our garage redo started here; never going back.
Tool Holder Divider
Side-by-side walls with a central holder. Pegs and shadow boards shine. I sketched mine first – turned out better than planned.
Cabinet Build Station
Unfinished cabinet with tools nearby for the win. Plywood base holds it all. Midway through my first build, this inspired the finish.
Drawer Workbench Storage
Workbench drawers stuffed right. Label fronts for sanity. Mine’s a bit crooked – adds character, right?
Wood Piece Tool Holder
Wall holder in front of wood – practical demo. Simple cutouts work wonders. Last weekend’s project used this exact vibe; so satisfying.
How to Actually Make This Work For You
Okay, real talk – start by measuring your space twice because I once cut a pegboard too short and had to patch it, total rookie move but fixable with duct tape. Grab basics like hooks, jars, and plywood from the dollar spot or scraps around the house, then group tools by how often you use ’em – daily drivers up high and visible, bulky stuff down low so you don’t strain your back reaching. Test it out with a small project first, like organizing screws in jars, and tweak as you go; it’ll feel custom in no time and way less overwhelming than it sounds.
What materials do I need for beginner tool storage DIY?
You’ll want pegboard, hooks, mason jars, plywood, and basic screws – all under $50 at most stores. No power tools required if you stick to hand-drillable stuff. I started with just that and built from there.
How long does a simple pegboard setup take?
About an hour if you’re new – measure, mount, hook it up. Mine took two coffees and some music. Adjust hooks later as needed.
Can I do this without a garage?
Totally – basement, closet, or even a pantry shelf works. I squeezed one into our laundry room first. Scale it small for tight spots.
What’s the best way to label everything?
Sharpie on tape or chalkboard stickers – erasable and cute. Keeps you from mixing up metric screws again. Pro tip: do it after sorting.