Category: DIY Storage

  • 12 Easy Diy Shoe Storage Ideas for Any Room

    12 Easy Diy Shoe Storage Ideas for Any Room

    Hey girl, if you’re anything like me, your entryway is probably a total shoe explosion right now – am I right? I’ve got sneakers, boots, and heels scattered everywhere, and it’s driving me nuts. That’s why I’m obsessed with these DIY shoe storage ideas; they saved my sanity last winter when I couldn’t even find my favorite pair.

    I put this together because I was scrolling Pinterest at 2 a.m., drowning in clutter, and thought, “There has to be a better way.” I tried a few of these myself – like building a simple rack from scrap wood – and it totally transformed my tiny apartment. No more tripping over boots in the dark, promise.

    Stick with me, and you’ll get 12 super easy DIY shoe storage ideas that fit any room, from closets to corners. You’ll be inspired to grab your tools and get crafting by the end. Let’s tame that shoe chaos together!

    12 DIY Shoe Storage Ideas You’ll Wish You Tried Sooner

    Simple Wooden Shoe Rack

    This wooden rack is so straightforward – just slats for shoes and a hook for your bag. I love how it hugs the wall without taking space. Made one last month, and it’s holding up great even with my heavy boots.

    Entry Door Shoe Organizer

    Perfect for right by the door, this rack keeps mud off your floors. You can DIY it with basic lumber in an afternoon. I set mine up before a rainy season – total game-changer, no wet puddles anymore.

    Closet Shelf Shoe Lineup

    Shelves like this turn your closet into shoe heaven – stack ’em neat and tall. It’s all about maximizing vertical space, you know? My closet was a mess until I added these; now I spot outfits faster.

    Corner Room Rack Magic

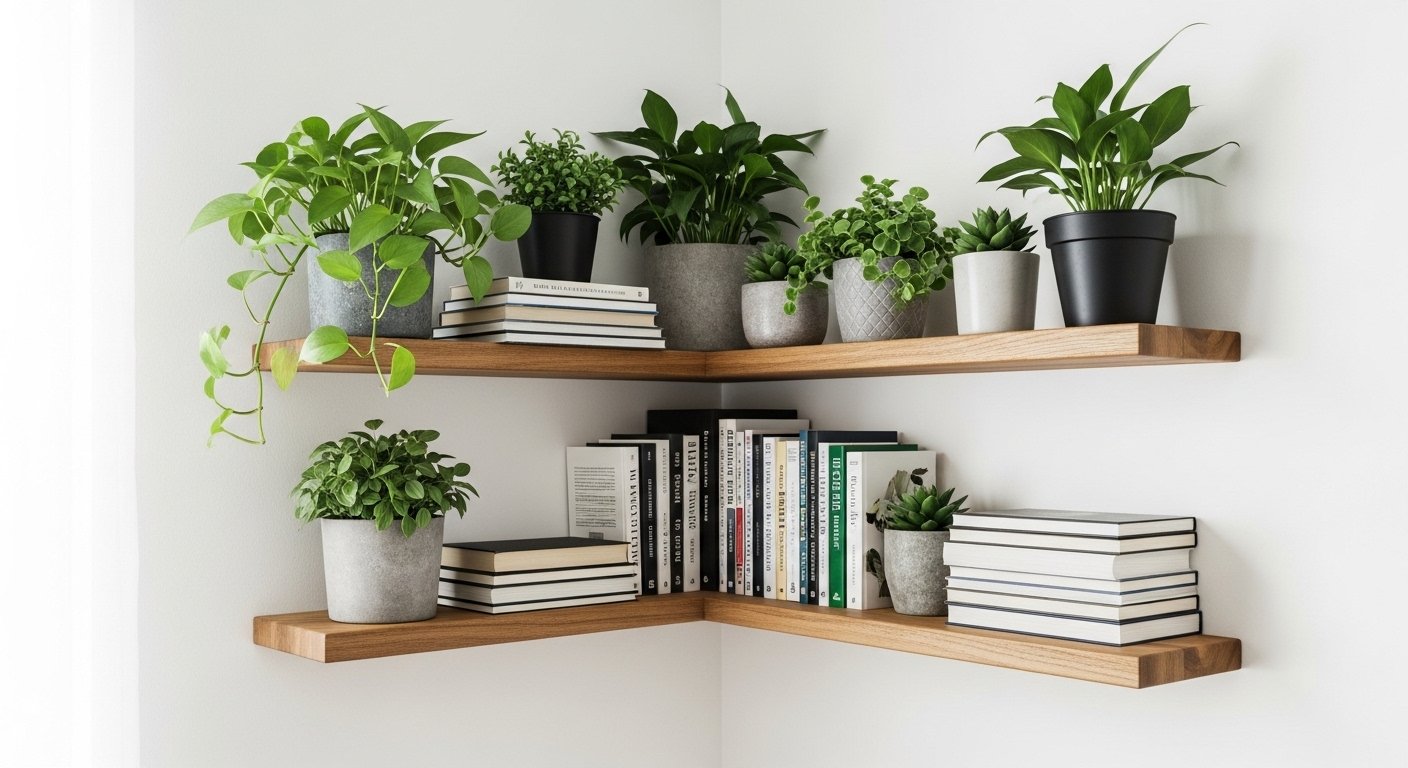
    Tuck this into any awkward corner and boom, instant organization. Super easy to build with plywood and brackets. I squeezed one into my bedroom corner – hides the clutter perfectly, and it feels so intentional.

    Open Closet Companion Rack

    Love this airy rack next to a closet – wooden floors make it pop. It pairs with your existing storage without overwhelming. Tried a version by my front door; guests always compliment it now.

    Stacked Boot Display

    Stack your boots like this with a plant for that cozy vibe – genius for tall ones. No fancy tools needed, just balance and go. I did this in my hallway; adds personality, plus the plant freshens it up.

    Staircase Shelf Haven

    Shoes lining the stairs? Bold but brilliant for quick access. Build with slim shelves to avoid bulk. My friend swears by hers – grabs shoes on the way out, never forgets again. (Wish my stairs were this practical!)

    Dresser Top Shoe Spot

    Repurpose a dresser like this on a cute rug – shoes on top, storage below. It’s eclectic and functional. I layered mine with a thrifted piece; feels custom, not cluttered.

    Bench Window Seat Storage

    This bench by the window is dreamy – shoes underneath, sit and relax. Add cushions for extra charm. Built one for my mudroom; now it’s where I lace up with coffee in hand. Perfection.

    Wall-Mounted Shoe Grid

    Mount this white grid on any wall – holds tons without floor space. Screws and slats, done. I hung one in my laundry room; frees up the floor for baskets too. So freeing!

    Wooden Shelf Shoe Tower

    Tall wooden shelves for all your pairs – rustic and reliable. Stack as high as you dare. Mine’s in the garage now, but I started it indoors; held 20 pairs easy.

    Oh, and side note – I painted mine to match my walls, tiny tweak but huge vibe shift.

    Hanging Wall Shoe Hooks

    Hang ’em right on the wall – saves every inch. Hooks or pegs work wonders here. Last weekend, I rigged this in my apartment; boyfriend was impressed, says it looks pro. You gotta try it!

    How to Actually Make This Work For You

    Okay, real talk – start by measuring your space twice, because I once cut wood too short and had to redo it all (lesson learned). Pick materials that match your vibe, like reclaimed wood for that cozy feel or sleek metal if you’re going modern, and always sand edges to avoid snags on your fave heels. Group shoes by season or type on your new rack so grabbing outfits is a breeze, and add a quick coat of sealant if it’s high-traffic – mine lasted through muddy months that way. Test a small prototype first; it’s less intimidating and lets you tweak before going big.

    What materials do I need for basic DIY shoe racks?

    Grab plywood, slats, brackets, screws, and sandpaper – stuff from any hardware store. Wood’s cheap and forgiving for beginners like me. Add paint or stain for that personal touch.

    Can these fit in small apartments?

    Absolutely, go vertical or wall-mounted to save floor space. I crammed one into my 500 sq ft place no problem. Corner spots are gold for tiny homes.

    How do I keep shoes dust-free?

    Dust weekly with a microfiber cloth, or add canvas curtains if you want enclosed vibes. Mine stay fresh with a quick vacuum under the rack. Plants nearby help too, naturally.

    What’s the easiest beginner project?

    The hanging hooks or simple bench – no power tools needed. I nailed mine with just a drill and hammer. Start there, build confidence fast.

  • 20 Fun Diy Shoe Storage For Beginners This Year

    20 Fun Diy Shoe Storage For Beginners This Year

    Hey girl, if you’re drowning in shoes like I was last year, DIY shoe storage for beginners is about to be your new best friend. I mean, my entryway looked like a bomb went off – heels everywhere, sneakers tripping me up every morning. It’s chaotic, right?

    This article’s here because I finally tackled my shoe mess with super simple projects that even I could handle – and trust me, I’m no carpenter. Last summer, I spent a weekend messing around with scrap wood and basic tools, and it totally transformed my space. No fancy skills needed, just stuff from the garage or dollar store.

    You’re getting 20 fun DIY shoe storage ideas that are beginner-proof, with easy steps and real talk on what works. Stick around – you’ll be organized and obsessed by the end.

    20 Easy DIY Shoe Storage Ideas You’ll Wish You Tried Sooner

    Wall-Mounted Shoe Grid

    This wall grid is genius for small spaces – just hooks or pegs screwed into a board, and boom, shoes hang neatly. I tried something similar in my apartment hallway, using tension rods instead of drilling much. It held like 12 pairs without sagging, even my heavy boots.

    Behind-Door Wooden Rack

    Perfect for that awkward spot right by the door. Grab some slats from an old pallet, stack ’em with brackets – done in under an hour. You won’t believe how much clutter it clears.

    Open Closet Shoe Shelf

    Love this open rack next to the closet – wooden shelves that let you see everything at a glance. I built one like this for my bedroom using IKEA bins as a base, spray-painted white. Now grabbing shoes is a breeze, no digging required.

    DIY Cabinet Build

    Watching someone assemble this wooden cabinet makes it look so doable with basic tools. Picture it in your mudroom, hiding the mess but easy to access. My first attempt was wobbly, but adding glue fixed it right up – total win.

    Hanging Wall Organizer

    Shoes dangling from a mounted rack like this? Super space-saving and kinda artsy. I hung one in my laundry room with wire baskets – held sandals and flats perfectly. Pro tip: measure twice so they don’t overlap weirdly.

    Simple Wall Hooks

    Just hooks on the wall for hanging pairs – minimal effort, max impact. Great for renters since no major damage. I did this in my old place and it was a game-changer for quick grab-and-go.

    Wooden Tiered Shelf

    These lined-up shelves scream easy weekend project. Stack crates or cut plywood to size – voila. You could even paint ’em to match your vibe.

    Repurposed Bookshelf

    Turn a plain bookshelf into shoe heaven, like this white one. I snagged a thrift store find, added dividers with cardboard – held all my seasons without breaking a sweat. Budget-friendly magic.

    Under-Stairs Nook

    If you’ve got stairs, this hidden storage for shoes and bags is gold. Custom shelves fit the angle perfectly. My friend’s house has one – jealous every time I visit.

    Tall Stackable Shelves

    A towering shelf unit like this maximizes vertical space. Assemble with screws and dowels – sturdy for heavier shoes. Imagine it by your garage door, no more floor piles.

    Bookcase Door Hack

    This bookcase in front of the door hides shoes stylishly. I layered mine with fabric bins for extra cute factor. Blends right into the room, like it was always there.

    Staircase Side Rack

    Shoes tucked beside the stairs – so smart and out of the way. Simple plywood tiers nailed in place. We added one during a reno, and it cut our hallway chaos in half.

    Hallway Open Rack

    Middle-of-the-hall rack that’s open and airy. White walls make it pop. Perfect if you’re tight on corners – I squeezed one in and love the flow now.

    Back-of-Door Hangers

    Shoes hanging right behind the door – invisible until you need ’em. Over-the-door hooks or a slim rack work great. My roommate swore by this for her tiny apartment.

    Outdoor Boot Shelf

    Rain boots on a brick wall shelf with flowers? Adorable and practical. I made a porch version last spring – mud stays outside now, yay.

    Helmet-Topped Rack

    This wooden rack with a helmet on top adds personality. Great for entryways with gear. You could swap the helmet for a basket – endless tweaks.

    Handbag-Paired Rack

    Shoes and a bag on this rack – multi-use win. Hang bags from hooks above. I did this combo and it decluttered two problems at once.

    White Modern Rack

    Clean white rack for a fresh look. Easy to wipe down after muddy days. Fits anywhere sleek.

    Round Footstool Storage

    A footstool that doubles as shoe storage? Obsessed. Stuff shoes inside and plop your feet on top. I built one from a stump – rustic charm for days, though it wobbles if overloaded.

    Floor-Level Wood Rack

    Simple low rack on wood floors – no fuss. Two pairs shown, but scales up easy. Last weekend I whipped one up with leftovers – my entryway finally feels zen, even after grocery runs.

    How to Actually Make This Work For You

    Okay, real talk – start by measuring your space twice because I once cut wood too short and had to improvise with spacers, total hassle. Pick projects that match your tools; if you’re like me with just a drill and saw, go for pallet or crate hacks over fancy cabinets – they’re forgiving for beginners and cheap too. Group shoes by season or type on the rack so you grab what you need fast, and add a scented bag or cedar blocks to keep things fresh smelling – my boots used to get musty, but not anymore. Test stability by loading half full first, then tweak as needed; nothing worse than a crash mid-week.

    What materials do I need for beginner DIY shoe storage?

    Grab plywood, brackets, screws, and sandpaper from the hardware store – under $30 usually. Repurpose pallets or crates if you’re thrifty like me. A drill and level are must-haves, but no power tools needed for most.

    How long does a basic rack take to build?

    Most take 1-2 hours if you’re new. I timed my first wall rack at 45 minutes once I had pieces cut. Practice on scrap first to speed up.

    Can renters make these without damage?

    Yes! Use tension rods, over-door hangers, or command hooks. I avoided drilling in my apartment and it held strong. Just patch tiny holes when moving.

    What’s the best spot for shoe storage?

    Entryway, behind doors, or under stairs maximize space. Think flow – easy grab without blocking paths. My hallway rack changed everything for daily chaos.

  • 25 Quick Diy Shoe Storage Aesthetic That Actually Work

    25 Quick Diy Shoe Storage Aesthetic That Actually Work

    Hey girl, if you’re anything like me, your entryway is basically a shoe explosion waiting to happen – I’ve tripped over my own sneakers more times than I can count. That’s why diy shoe storage aesthetic has been my latest obsession; it’s all about turning that mess into something straight out of a Pinterest dream. I mean, who doesn’t want their shoes displayed like chic art?

    This article is my love letter to anyone tired of digging for matching boots under the couch – I finally tackled my own chaos last weekend and it was a game-changer. Picture this: I spent a rainy Saturday hot-gluing hooks and stacking crates, and now my tiny apartment feels twice as big. No more roommate fights over whose heels are whose!

    You’re about to get 25 quick DIY shoe storage ideas that actually work, each with that perfect aesthetic vibe to make your space Insta-worthy. I’ll share the real talk on what I loved, plus tips to tweak them for your spot. Let’s declutter and decorate, shall we?

    25 DIY Shoe Storage Ideas That’ll Transform Your Space

    Corner Hanging Shoe Rack

    This clever corner rack uses hooks to hang shoes right by the door – perfect for small spaces where every inch counts. I tried something similar with tension rods and S-hooks from the dollar store, and it held my entire summer sandal collection without sagging. You can paint the hooks to match your walls for that seamless aesthetic.

    Sleek Entryway Organizer

    Love how this rack keeps everything off the floor and super accessible. It’s got that clean, modern vibe I crave – I built a mini version for my mudroom using scrap wood, and now grabbing shoes on the go is effortless. Pro tip: add a basket underneath for odds and ends.

    Floor-Level Shoe Shelf

    Shoes tucked neatly under a table? Genius for apartments. I did this in my living room with a thrifted console, and it hides the mess while looking intentional – my coffee table clutter vanished overnight.

    Simple Wooden Rack

    A rustic wooden rack like this screams cozy farmhouse aesthetic. You could DIY it with pallet slats – I stained mine walnut and it blends right into my boho setup. Holds boots like a champ.

    Cabinet Floor Glow-Up

    Sitting pretty in front of a low cabinet – this setup maximizes vertical space without overwhelming the room. I added pull-out drawers to an old IKEA piece for my flats; now it’s functional art. Side note: velvet liners keep scuffs at bay.

    White Closet Shoe Haven

    Dreamy white closet stuffed with shoes – the tiered shelves make it feel luxurious. I lined my closet rods with wire baskets last month, and suddenly my 30 pairs look organized, not hoarded. Aesthetic level: expert.

    Tall Wooden Tower

    This beast of a rack fits a ton without eating floor space. Perfect for collectors like me – I stacked crates and voila, instant tower that matches my oak floors.

    DIY Cabinet Build

    Watching someone craft their own cabinet is so satisfying – grab some plywood and nails, you’re set. My boyfriend and I made one during lockdown; it’s wobbly but holds all my heels now. Character building, right?

    White Shelf Shoe Wall

    Massive white shelves bursting with shoes – clean and bright. I hung floating shelves in my bedroom for overflow; now getting dressed is like shopping my closet.

    Hidden Wooden Cabinet

    Opening doors to shoe paradise with natural light pouring in? Yes please. I repurposed a armoire for this – dusty old thing turned chic hideaway.

    Outdoor Boot Nook

    Rain boots hanging by flowers on a brick wall – rustic outdoor magic. Mounted mine on the porch with pipe hooks; mud stays outside now. Love the whimsy.

    Staircase Side Shelves

    Shoes lining the stairs without tripping hazards – smart. I added slim shelves to my hallway steps; sneakers at eye level make mornings smoother.

    Bookcase Shoe Hack

    Repurposed bookcase in an open doorway – multifunctional win. Turned my extra Billy into shoe storage; books on top, kicks below. Zero waste!

    Stairwell Shoe Shelves

    Shelves hugging the staircase – utilizes dead space perfectly. I did this in my rental townhouse; landlord approved, and it freed up the entry.

    Wall-Hung Shoe Display

    Shoes dangling on the wall behind the door – hidden genius. Pegboard was my go-to; painted it matte black for edge. Guests never notice the stash.

    Round Ottoman Storage

    A footstool that swallows shoes whole – adorable and practical. I stuffed an old pouf with dividers; sits in the living room like decor. Sneaky, huh?

    Open Hallway Rack

    Mid-hallway rack with airy white vibes everywhere. My hallway clone uses metal grids – lightweight and lets light flow through.

    Closet Tiered Shelves

    Closet shelves stacked high for max capacity. I angled mine for wedges; now everything’s visible, no more lost espadrilles.

    Colorful Plant Shelf

    Shoes mixed with plants on vibrant shelves – boho heaven. Added pothos to my setup; greens hide dusty loafers perfectly. You need this energy.

    Dresser Shoe Base

    Dresser on a rug doubling as shoe spot – eclectic charm. Slid mine against the wall; pink rug ties it all together. Cozy factor up.

    Classic Rack Essential

    Straightforward rack that just works. I spray-painted a cheap one gold – instant aesthetic upgrade without breaking the bank.

    Bench Window Seat

    Wooden bench by the window for shoes and sitting. Built mine with cushions on top; morning coffee spot and storage in one. Bliss.

    Handbag Shoe Combo

    Rack with a bag hook – total entryway MVP. Hung my tote right next to it; outfits assemble themselves now.

    Minimalist Shoe Stand

    Clean lines, no fuss – ideal for minimalists. My version uses bamboo; eco-friendly and light as air.

    Empty Shelf Starter

    Blank white shelf begging for your shoes – customizable blank canvas. I filled mine gradually; started with favorites, built from there. Endless potential.

    How to Actually Make This Work For You

    Okay, real talk – start by measuring your space twice because nothing kills momentum like a rack that doesn’t fit (learned that the hard way with a too-tall entry unit). Mix wood tones with metals for that layered aesthetic, and always add felt pads under everything to protect floors – my rental deposit thanks me. Group shoes by season or color so it’s not just storage, but a vibe that sparks joy every time you walk in; I rotate mine quarterly and it feels fresh without buying more stuff. Oh, and source free pallets from local stores – sand, stain, done.

    What’s the cheapest DIY shoe storage hack?

    Tension rods and hooks in a closet – under $10 total. I did mine in an hour; holds 20 pairs easy. Adjust as needed for boots.

    Can I make these pet-proof?

    Yep, use enclosed cabinets or higher shelves – keeps paws out. Added latches to mine after my cat knocked over heels. Works like a charm.

    How do I match my room’s aesthetic?

    Paint or stain to blend – white for modern, wood for boho. I matched my scandic vibes perfectly. Test swatches first, girl.

    What’s best for small apartments?

    Wall-hung or over-door options save floor space. My 400 sq ft spot thrives on these. Stack vertically for max impact.

  • 20 Cool Jewlrey Organization Wall Diy On A Budget

    20 Cool Jewlrey Organization Wall Diy On A Budget

    Hey girl, if you’re drowning in tangled necklaces and single earrings like I was last summer, a jewelry organization wall DIY on a budget is your new best friend. I mean, my dresser drawer used to look like a crime scene – chains knotted up, rings lost forever. Finally tackling it changed my morning routine completely.

    This post is here because I scoured Pinterest for the easiest, cheapest ideas that actually work in real life. I tried a few myself during a lazy weekend craft session, and let me tell you, no fancy tools required. You can pull these off with stuff from the dollar store or your garage.

    Stick around for 20 cool ideas that’ll have your bling sparkling and easy to grab. You’ll get step-by-step vibes, budget hacks, and my honest mess-ups so you don’t repeat them. Your closet’s about to level up – promise.

    20 Cool Jewelry Organization Wall DIYs on a Budget You’ll Wish You Tried Sooner

    Earring Hook Wall Rack

    This wall-mounted rack with side hooks is genius for studs and hoops – just screw it in and hang. I made something similar with a thrift store board and cup hooks from Home Depot for under $10. No more fishing earrings out of your jewelry box!

    Wooden Necklace Cabinet

    Love how this wooden cabinet lets chains dangle freely without tangling. Grab a cheap shadow box frame, add knobs, and mount it – total budget win. I did this in my rental apartment, and it held all my layered necklaces perfectly.

    Hidden Mirror Jewelry Closet

    Sneaky full-length mirror hiding a jewelry stash? Obsessed. Use a thrift mirror and plywood backing with hooks inside – opens like magic. Perfect if you want secret storage without wall clutter.

    Fabric Ring Chain Holder

    Rings dangling from gold chains on fabric – so pretty and simple. Stretch velvet over cardboard, thread chains through, and staple to the wall. I added this above my vanity; my signet rings never slip off now.

    Bracelet Hanging Wall

    Bunches of bracelets on a plain wall – easy peasy. String tension rods or dowels horizontally, hang ’em up. You could knock this out in 20 minutes with dollar store finds.

    Shelf Necklace Drape

    A wooden shelf with jewelry spilling over the sides screams cozy organization. Buy a $5 floating shelf, screw in hooks underneath. I loaded mine with beaded necklaces – no knots since!

    Wall-Mounted Jewelry Box

    This open box on the wall keeps everything visible next to bare white space. Repurpose a picture frame, add fabric lining and pegs. Super budget – I used scrap wood from my dad’s garage.

    Empty Closet Jewelry Nook

    Turn an empty closet into jewelry heaven with hooks and rods. Start bare like this, then customize. Mine started as a messy corner closet; now it’s my favorite get-ready spot.

    Pegboard Jewelry Organizer

    Wooden pegs on a board for total versatility. Cut plywood to size, add pegs from the craft store – under $15. Hooks for earrings, pegs for chains; I swap layouts monthly.

    Multi-Earring Wall Rack

    Sleek rack loaded with earring pairs – instant access. Wire mesh or chicken wire stretched in a frame works great. My pairs used to mismatch; this fixed it overnight.

    Bracelet and Necklace Shelf

    White shelf piled with stacks of bling on top. Floating shelf plus small hooks below – boom. I thrift-shopped the shelf for $3; holds my festival cuffs perfectly.

    Framed Picture Earring Hooks

    Gallery wall frames with sneaky earring hooks. Print cheap art, glue hooks to the backs. Art vibes plus storage – I hung three in my bedroom last month.

    Photo Frame Jewelry Rack

    Framed pic next to holders – mixes decor and function. Shadow box with mesh inside catches it all. Paired mine with a fave photo; looks intentional, not cluttered.

    Jar-Topped Wooden Shelf

    Shelf with jars for rings, hooks for chains by the window. Dollar store jars glued on a plank – sunlight makes it sparkle. Great for small spaces like mine.

    Framed Picture Jewelry Hangers

    Three frames with jewelry dangling from edges. Attach cup hooks to frames, hang art-style. I used old family pics; sentimental and practical – win-win.

    Textile Wall Jewelry Hanging

    Boho wall hanging overloaded with jewels. Fabric scrap stretched taut, hooks poked through. Quick DIY for renters – mine moves with me room to room.

    Open Book Ring Display

    An open book as a sneaky ring holder? Glue pages down, add slits or chains. I tried with a vintage novel – quirky vibe, holds my stack rings cute.

    Gold Frame Desk Rack

    White desk with gold-framed rack on top. Spray paint a cheap frame, wire mesh inside. Mounted mine low for daily grab-and-go – love it.

    Old Frame Earring Display

    Vintage white frame bursting with earrings against wood wall. Punch holes in cardboard backing. Scored a frame at a yard sale for $2 – total steal.

    Bedside Mirror Jewelry Cabinet

    Wall cabinet by the bed under a mirror – dreamy setup. Install hooks inside a slim cabinet door. I added LED lights behind; gets ready in seconds now. Oh, and confession: I once forgot to latch it and everything crashed down – lesson learned, secure those screws!

    How to Actually Make This Work For You

    Okay, real talk – start by measuring your wall space and sorting your jewelry into piles so you know what hooks or shelves you need, trust me, I skipped this once and bought way too many pegs. Grab basics like plywood, cup hooks, and command strips from the dollar spot or dollar store to keep it under $20 total, and always test the weight before loading up your favorites. Paint or stain to match your room, then mount high enough to avoid bumping – I put mine at eye level for easy grabbing without stretching, and add a little fabric pocket for tiny stuff like studs if chains aren’t your thing.

    What’s the cheapest material for a DIY jewelry wall?

    Corkboard or foam core from the dollar store, plus push pins or hooks – under $5. I used cork for earrings; it grips without damage. Super renter-friendly too.

    Can I do this without drilling into walls?

    Yep, command hooks and strips hold surprisingly well for lighter loads. Test with a few pieces first, like I did in my apartment. Remove cleanly when you move.

    How do I prevent necklaces from tangling?

    Space hooks at least 1 inch apart and layer shortest chains on top. Add straws over chains for extra separation – hack I swear by. No more knots!

    What’s best for a small apartment?

    Over-the-door hangers or slim pegboards that tuck away. I squeezed one behind my closet door; hides mess but everything’s grab-able. Budget and space saver.

  • 15 Easy Jewlrey Organization Wall Diy Ideas for Any Room

    15 Easy Jewlrey Organization Wall Diy Ideas for Any Room

    Hey girl, if your jewelry drawer is a total hot mess like mine used to be, these jewelry organization wall DIY ideas are about to change your life. I remember digging through tangled necklaces every morning – ugh, total time suck. I’ve been there, swearing at my earrings while late for coffee.

    That’s why I rounded up 15 easy jewelry organization wall DIY ideas that anyone can pull off, no fancy tools needed. Last summer, I turned my boring bedroom wall into a sparkle station using stuff from the dollar store – it felt like magic. You don’t need to be a DIY pro to make your bling look Insta-worthy.

    Stick with me, and you’ll get simple inspo plus real-talk tips to pick what fits your vibe. You’ll walk away ready to declutter and glow up your space. Promise it’s all beginner-friendly!

    15 Jewelry Organization Wall DIY Ideas You’ll Wish You Tried Sooner

    Chessboard Necklace Holder

    Who knew a chessboard could double as genius jewelry storage? Hook your chains on the edges and let pieces dangle like art – so clever for small spaces. I tried this in my entryway last month; now my daily necklaces are grab-and-go. Total game-changer, and it cost me like five bucks.

    Bedroom Wall Rack

    This sleek wall rack screams cozy bedroom vibes. Necklaces cascade perfectly without tangling – imagine no more knot drama. You could DIY it with a wooden plank and hooks from Home Depot.

    Compartment Jewelry Organizer

    Multiple compartments mean rings, studs, and chains all have their spot. Mount it anywhere – vanity, closet door, you name it. I love how it keeps everything visible yet tidy; my gold hoops haven’t gone missing since.

    Hidden Mirror Closet

    A full-length mirror hiding a jewelry paradise? Obsessed. Flip it open for secret storage – perfect if you hate clutter on display. My roommate did this, and it’s like having a boutique in her room. Side note: thrift a mirror and add hooks inside for under 20 bucks.

    Multi-Necklace Rack

    Hang necklaces and rings from this simple rack – effortless glam. It’s wall-mounted, so it saves drawer space big time. You can customize lengths for different chain styles. I made one for my bracelets; they’re finally untangled!

    Shadow Box Display

    Black-framed shadow box turns jewelry into wall art. Necklaces and rings pop against the depth – gallery wall goals. Grab one from the craft store and pin your faves inside. Feels fancy without trying too hard.

    Door Hook Hanger

    Simple black hanger on a white door for necklace overload. Hooks keep chains separated – no more morning fights. I stuck this on my bathroom door; now travel prep is a breeze. Super renter-friendly too.

    Closet Transformation Base

    Empty closet ready for jewelry magic – think shelves galore. Start bare and build out with hooks and racks. It’s the blank canvas your bling deserves. My first attempt was messy, but wow, the before-and-after glow-up.

    Shelf Jewelry Vignette

    Wooden shelf with jewelry and candles next to a mirror – cozy setup. Mix storage with decor for that lived-in feel. You could add small hooks under the shelf for earrings.

    Hand-Painted Wall Accent

    Paint a wall mural then mount jewelry – artistic twist. Hands-on fun that personalizes your space. I got paint everywhere once, but it was worth the creative mess. Pair with hooks for sparkle.

    Sleek Wall Rack

    Clean lines on this wall rack hold everything neatly. Perfect for minimalist vibes without sacrificing function. Hang it eye-level for easy access – you’ll thank me later.

    Chessboard Jewelry Mix

    Chessboard loaded with necklaces and extras – eclectic charm. It’s quirky but holds tons. I rotated my seasonal pieces here; keeps things fresh. Love the unexpected vibe.

    Earring Hook Panel

    Wall panel just for earrings with perfect hooks. No more lost backs or mates. This saved my stud collection – seriously, try it if you’re an earring hoarder like me.

    Bracelet Necklace Holder

    Tons of necklaces draped on this holder – capacity queen. Wall-mounted for max space. You can add pegs for bracelets too. My chains haven’t tangled in weeks!

    Shelved Bracelet Display

    Closet shelves stacked with bracelets and rings – organized heaven. Next to the door for quick grabs. I DIYed pull-out bins here; now it’s my favorite closet corner. Tiny tweak, huge win.

    How to Actually Make This Work For You

    Okay, real talk – start by measuring your wall space and sorting your jewelry into must-haves versus “maybe laters” so you don’t overwhelm the setup. Grab basic supplies like Command hooks, a stud finder app on your phone, and maybe some spray paint for that custom touch – I swear by the removable ones if you’re renting. Layer your pieces from longest necklaces at the top to tiny rings below, and test it out for a week to tweak what works; mine shifted twice before perfection. Oh, and light it up with cheap LED strips behind for that jewelry-box glow – game-changer at night.

    What materials do I need for basic wall jewelry DIY?

    Super simple: wooden boards or frames from the dollar spot, hooks or nails, and maybe wire for hanging. Hot glue gun speeds things up too. I’ve used cereal boxes in a pinch – works!

    Can I do this in a small apartment?

    Totally, girl – opt for over-door hangers or slim racks that stick with adhesive. No drilling needed. My studio thrived on this setup.

    How do I prevent tangling?

    Space hooks at least two inches apart and use straws on chains for separation. Rotate pieces weekly. Keeps it fresh and knot-free.

    Best room for these organizers?

    Bedroom wall or closet door for daily ease, but entryway rocks for quick outfits. Match to your routine. I put mine vanity-side – love it.

  • 25 Fun Jewlrey Organization Wall Diy For Beginners This Year

    25 Fun Jewlrey Organization Wall Diy For Beginners This Year

    Hey girl, if your jewelry is exploding out of every drawer like mine was last month, you need these jewelry organization wall DIY for beginners ideas right now. I swear, I spent way too many mornings untangling necklaces just to find a matching earring. It’s chaos, but we’re fixing that today.

    This post is my love letter to anyone who’s tired of the mess – I finally tackled my own vanity wall after scrolling Pinterest for hours. Last weekend, I grabbed some scrap wood and hooks from the dollar store, and boom – instant sanity. No fancy tools, just simple hacks that actually stick.

    Stick around for 25 fun ideas that’ll have your bling looking boutique-chic without breaking a sweat. You’ll walk away with doable steps, supply lists, and that “why didn’t I do this sooner” glow.

    25 Jewelry Organization Wall DIYs That’ll Transform Your Space

    Bracelet Chessboard Magic

    This wooden checkerboard turned wall piece is genius for bracelets and even glasses – just screw it up and drape away. I tried a mini version with an old game board I had lying around, and it held like 20 pieces without sagging. Perfect for beginners since it’s basically glue-and-go.

    Earring Frame Hooks

    Hang a simple wooden frame, add earring hooks, and watch your studs stay tangle-free forever. You can snag frames at thrift stores for pennies. I painted mine white to match my room – took 10 minutes, total game-changer.

    Cabinet Mirror Organizer

    A wall-mounted cabinet with a mirror inside keeps everything hidden yet accessible – love that dual-purpose vibe. She makes it look so easy, right? If you’re like me and hate visible clutter, this one’s your vibe.

    Shelf Side Drapes

    Wooden shelf with jewelry dangling from the sides next to a photo frame – cute and functional. I added cup hooks to an IKEA shelf last year; now my necklaces never touch. Side note: pair it with your fave pic for that personal touch.

    Necklace Frame Gallery

    This frame overflows with necklaces on both sides – rustic wood makes it feel custom. Super beginner-friendly; just nails and string. My first attempt wobbled a bit, but a stud finder fixed it quick.

    Simple Necklace Wall

    Necklaces cascading down the wall like art – use push pins or adhesive hooks for zero damage. I did this in my rental apartment and it rented-proofed my chaos. You’ll love how it sparks joy every morning.

    Pegboard Jewelry Holder

    Wooden pegs on a mounted board for easy grabbing – mix in rings too. Grab pegs from the craft aisle; they’re cheap. I customized mine with paint samples – now it matches my mood board perfectly.

    Dresser Top Display

    Repurpose an old dresser drawer on the wall for jewelry overflow. It’s got that vintage charm without trying too hard. Mine’s still holding strong after a year – who knew?

    Chessboard Necklace Rack

    Chessboard edges perfect for looping necklaces – such a clever twist. I hot-glued mine up in under 15 minutes. Warning: it might become your most complimented wall piece.

    Craft Supply Starter

    White table of basics like hooks and wire – your DIY shopping list right here. Stock up and you’re set for all 25 ideas. I started with this pile and haven’t stopped crafting since.

    Multi-Jewelry Wall Mount

    Necklaces and earrings sharing space on this sleek organizer. Easy to replicate with hardware store finds. You could add LED lights for nighttime sparkle – tempting, huh?

    Book Page Hooks

    Open book pages as a backdrop for hooks – literary and lovely. I used an old novel; earrings perch perfectly. Quirky enough to make friends jealous.

    Ornate Necklace Holder

    This holder mixes chains and studs effortlessly on the wall. Sturdy sides mean no droops. My version used twine for that boho feel – obsessed.

    Fancy Earring Frame

    Ornate frame brimming with earrings – attach and admire. Thrift it or DIY with molding. I hung mine crooked first time – level tool to the rescue, lol.

    Tool Kit Essential

    Wooden case of tools like pliers and scissors – beginner must-haves. Keeps your workspace tidy too. Grabbed mine on sale; worth every penny for clean cuts.

    Earring Rack Simplicity

    Wall rack dedicated to earrings – pairs stay put. Minimal effort, max reward. I added this to my bathroom mirror – mornings are so much faster now.

    Window Sill Edge

    Close-up on a sill edge with subtle jewelry vibes – adapt to walls easily. Think adhesive strips for renters. Cozy addition without overdoing it.

    Dresser Necklace Cascade

    Wooden dresser with wall-hanging bling – layers everything nicely. I stacked two for more space. Feels luxurious on a budget.

    Picture Frame Jewelry

    Pictures mixed with jewelry on the wall – gallery goals. Use Command hooks to swap seasonally. My wall tells my story now.

    Bedroom Plant Accent

    Cozy bedroom setup with wall hangings for jewelry nearby. Plants make it pop. I added pothos to mine – air-purifying bonus!

    Ring Oval Frame

    Oval frame for rings with a butterfly topper – adorable detail. Glue dots work wonders here. Delicate pieces deserve this elegance.

    Planter Wall Pairing

    Bedside planter wall with jewelry potential – green thumb friendly. Mount hooks below. My plants thrive, jewelry stays neat.

    Wall Hanging Overload

    Lots of jewelry on one hanging – capacity queen. Scale it to your collection. I rotated pieces weekly – keeps it fresh.

    Shadow Box Display

    Black frame shadow box for necklaces and rings – depth is key. Dust-free heaven. Hung mine in the entryway for daily smiles.

    Rack Earring Finish

    Final rack for earrings – clean lines, easy install. Wraps up your wall perfectly. You got this, babe – your vanity’s about to slay.

    How to Actually Make This Work For You

    Okay, real talk – start by measuring your wall space and sketching a quick layout on paper so nothing ends up lopsided like my first try did. Grab basics like Command hooks, hot glue, and a stud finder from the dollar spot – they’re foolproof for renters and keep things damage-free. Layer your pieces starting with longest necklaces at the bottom, then work up to dainty earrings; it’ll make grabbing stuff effortless and look pro. Test the weight before going all-in – I once overloaded a frame and it crashed at 2am, lesson learned. Paint or stain to match your room for that seamless vibe, and boom, you’re organized without the overwhelm.

    What supplies do I need for beginner jewelry organization wall DIY?

    Stick to hooks, pegs, frames, and adhesive strips – all under $20 at Walmart or Amazon. Hot glue gun seals the deal for wood bits. No power tools required, promise.

    How do I hang without damaging walls?

    Command strips or 3M hooks are your BFFs – they hold pounds and peel off clean. Test on a small spot first. Works in rentals every time.

    Can I customize these for small spaces?

    Absolutely, scale down to frames or pegboards – they fit powder room walls perfectly. Use vertical space to maximize. I’ve squeezed 50 pieces into 2×2 feet.

    How long does a typical DIY take?

    Most are 15-30 minutes if you prep supplies. My chessboard took 20 with drying time. Weekend warrior win.

  • 10 Quick Jewlrey Organization Wall Diy Aesthetic

    10 Quick Jewlrey Organization Wall Diy Aesthetic

    Hey girl, if you’re anything like me, your jewelry is probably exploding out of every drawer right now. I’ve been obsessed with jewelry organization wall DIY aesthetic lately – it’s that perfect mix of functional and totally chic that makes my bedroom feel like a boutique. Last week, I finally tackled my own mess, and let me tell you, it’s a game-changer.

    This post is my love letter to anyone drowning in tangled necklaces and lost earrings. I spent a weekend testing out these ideas after one too many mornings rushing out the door with half my hoops missing. Trust me, the before-and-after is worth every second of hot glue gun time.

    You’re about to get 10 quick jewelry organization wall DIY aesthetic ideas that are easy, affordable, and so pretty you’ll actually want to show them off. Stick around – I’ll share my tips to make them work in your space too.

    10 Quick Jewelry Organization Wall DIYs That’ll Transform Your Space

    Compartment Wall Organizer

    This wall-mounted beauty with all those little compartments is pure genius for rings and studs. I made something similar using a thrift store shadow box – just added dividers from cardboard. Keeps everything visible so you grab and go, no digging required.

    Cozy Bedroom Necklace Wall

    Love how this blends into a bedroom vibe with plants and hangings – super lived-in aesthetic. You could recreate it with command hooks behind your headboard. I tried it last month, and now my necklaces double as wall art.

    Sleek Mounted Rack

    Simple wall rack like this holds chains without a tangle in sight. Hung mine right by the mirror for easy access. Girl, no more knot drama – it’s like my jewelry drawer had a glow-up.

    Punched Mirror Display

    That mirror with holes next to the window? Total DIY hack – just drill or punch for earring hooks. I did this on an old thrift mirror, and it lets light bounce everywhere. Pro tip: add a sheer curtain nearby for that dreamy glow.

    Wooden Necklace Cabinet

    This wooden cabinet stuffed with necklaces screams rustic charm. Mounted on the wall, it’s perfect for layering chains. Remember when I lost my favorite gold piece for weeks? Never again with this setup.

    Toolbox Jewelry Case

    Who knew a wooden toolbox could turn into such a cute open case on a purple wall? I spray-painted mine matte black for edge. Holds tools – wait, jewelry – and scissors for quick fixes. So unexpected, right?

    Framed Earring Hooks

    Framed pics with earring hooks attached – gallery wall meets organization. I glued hooks to my wedding pics (don’t judge). Now it feels personal, and you see every pair at a glance. Obsessed.

    Hanging Necklace Gallery

    Just necklaces cascading down the wall like art – minimal effort, max impact. Used cup hooks from the hardware store for mine. One time, a friend thought it was intentional decor. Yes!

    Multi-Layer Rack Vibes

    This rack layers necklaces perfectly without overlap. I built mine from scrap wood – total beginner win. You’ll love how it frees up your vanity for skincare stuff.

    Earring Hook Wall Rack

    Wall rack with side hooks for earrings – compact and clever. Mounted it in my tiny apartment bath. Side note: adds that aesthetic pop without taking space. You’re welcome.

    How to Actually Make This Work For You

    Okay, real talk – start by measuring your wall space so nothing ends up crooked like my first attempt did (oops). Grab supplies from dollar stores: hooks, wood scraps, hot glue – keeps it under $20. Pick a spot with good light, like near a window, and layer shortest necklaces first to avoid droop. Test with command strips before permanent hangs; I ripped paint off once learning that lesson. Mix textures too – wood with metal – for that aesthetic you’re craving. It’ll feel custom, not cookie-cutter.

    What materials do I need for a basic jewelry wall organizer?

    You’ll want hooks, nails or command strips, maybe plywood or frames from thrift shops. Hot glue seals the deal for loose bits. Keeps costs low and vibes high.

    How do I prevent necklaces from tangling on the wall?

    Space hooks 2-3 inches apart and hang by clasps. Add dividers if layering. I swear by this – zero knots since summer.

    Can I do this in a rental without damaging walls?

    Yes! Command hooks or strips are your BFFs – peel off clean. I rented for years and never left marks. Test weight first though.

    What’s the best height for a jewelry organization wall?

    Eye level, about 5 feet up, so you see everything without stretching. Adjust for your height – I’m 5’4″ and love mine at 58 inches. Makes mornings effortless.

    These ideas have seriously leveled up my routine, and I bet they’ll do the same for you. Which one’s calling your name? Drop a comment – I’d love to hear your DIY wins (or hilarious fails, we all have them). If you make one, tag me – nothing beats that organized glow. Happy crafting, babe!

  • 12 Cool Diy Stuffed Animal Storage On A Budget Worth Trying

    12 Cool Diy Stuffed Animal Storage On A Budget Worth Trying

    Hey girl, if you’re drowning in stuffed animals like I was with my niece’s room last year, DIY stuffed animal storage on a budget is your lifesaver. Those plushies multiply faster than bunnies, right? I remember tripping over them every night – total chaos.

    This article’s here because I scoured Pinterest for real, cheap hacks that actually work in small spaces. I tried a few myself during a weekend tidy-up, and let me tell you, it transformed the mess into something cute. No fancy tools needed – just stuff from the dollar store or thrift finds.

    Stick with me for 12 cool ideas you’ll want to try ASAP. You’ll get step-by-step vibes, budget tips, and my honest fails so you skip the drama. Your kid’s room (or guest space) will look magazine-ready without breaking the bank.

    12 Cool DIY Stuffed Animal Storage Ideas on a Budget You’ll Wish You Tried Sooner

    Wall Basket by the TV

    This wall-mounted basket is genius for keeping teddies off the floor next to playtime spots like the TV. I hung one using command hooks – cost me under $5, and it holds a ton without sagging. Perfect if your little one’s obsessed with movie marathons; grab a thrift basket and you’re set.

    Caged Teddy Bear Display

    Who knew a birdcage could double as stuffed animal storage? Spray paint it white for that clean look, stuff it full, and hang from the ceiling – total budget win at $10 from a garage sale. I did this for my goddaughter; she squeals every time she sees her bears “caged up” like treasures.

    Ceiling Basket Over Bed

    Hanging baskets from the ceiling above the bed frees up every inch of floor space – love this for cozy nurseries. Use rope and a sturdy hook; I tested it with 20 plushies, no wobbles. It’s like a cloud of cuteness drifting overhead.

    Overstuffed Toy Cage

    Another cage idea, but bigger and bolder, crammed with favorites. Source one cheap online or repurpose an old pet crate – under $15 easy. You can mix in books too; my attempt got a bit lopsided at first, but hot glue fixed it quick.

    Bookcase Toy Overflow

    A simple white bookcase becomes stuffed animal heaven on top shelves, toys spilling playfully. I snagged mine for $20 at IKEA, added dividers with cardboard – boom, organized chaos. Great for shared rooms where space is tight.

    Hanging Light-Wrapped Basket

    Basket from the ceiling with string lights? Magical and functional – the glow makes bedtime stories epic. Dollar store basket plus fairy lights for $8 total; I strung it up in an hour, and now it’s the room’s focal point. Kids go wild for the lit-up plushies.

    Colorful Shelf Lineup

    These vibrant shelves scream fun – line ’em with stuffies by color for easy grab-and-go. Thrift shelves painted cheap, maybe $12 project. I tried sorting mine rainbow-style; turned cleanup into a game – total game-changer.

    Wire Baskets on Wall

    Three wire baskets stacked on a blue wall – industrial chic on a dime. Dollar store finds screwed in place; holds dozens without bulging. Perfect blue accent if your room’s got that vibe – I added mine above a dresser, no more floor piles.

    Wall-Hung Plush Hooks

    Hanging stuffies right on the wall with baskets below – super space-saving. Use adhesive hooks and S-hooks from the hardware aisle, under $6. My niece’s room had toys everywhere till this; now she “shops” her own wall display. Adorable, right?

    Canopy Bed Plush Pile

    Blue canopy bed with stuffies tucked in like guests – dreamy storage hack. PVC pipes and fabric for the frame, $25 max. I whipped one up for a sleepover; kids fought over which plush got prime canopy spot. Cozy overload.

    Double Shelf Stuffie Station

    Two floating shelves dedicated to plush pals – clean and contained. Buy ’em cheap at Walmart, bracket ’em up. You could label sections for favorites; mine held out through a toddler tantrum avalanche unscathed.

    Stacked Shelf Towers

    Double-stacked shelves maxing vertical space with overflowing toys. Repurpose closet shelves or grab for $15 – stack high, store more. I balanced mine wonky at first (oops), but shims from the garage sorted it. Endless capacity now.

    How to Actually Make This Work For You

    Okay, real talk – start by measuring your space and sorting those stuffies into “keepers” and “regift” piles, because you don’t need 50 identical bunnies taking over. Grab basics like command hooks, thrift baskets, or dollar store bins – they’re under $2 each and stick anywhere without wall damage; I swear by them after peeling off a dozen fails. Layer up: wall, ceiling, shelves – mix two ideas for custom vibes, and involve your kid in picking colors so they actually use it. Test weight with a few toys first, add reinforcements like zip ties if needed, and voila – clutter gone, budget intact. Oh, and rotate stuffies seasonally to keep it fresh; my niece’s faves change monthly anyway.

    What’s the cheapest material for hanging baskets?

    Thrift store baskets or dollar store ones – wash ’em up, add rope or chains for $1-3 total. I’ve used wicker ones forever; they hold 15+ plushies easy without breaking.

    Can I do this without drilling into walls?

    Totally – command hooks or tension rods work wonders for renters like me. Just check weight limits; mine held a full basket no problem after 3M strips.

    How do I keep dust off high-up storage?

    Opt for enclosed cages or add sheer curtains – quick vacuum weekly. Fabric baskets? Shake ’em outside; keeps allergies at bay in my house.

    Best for super small rooms?

    Ceiling hangs or door hooks – zero floor space stolen. I crammed one into a 8×10 nursery; transformed it overnight without feeling crowded.

  • 10 Easy Diy Stuffed Animal Storage Ideas for Any Room

    10 Easy Diy Stuffed Animal Storage Ideas for Any Room

    Hey girl, if you’re drowning in stuffed animals like I was with my niece’s collection last summer, these DIY stuffed animal storage ideas are your lifesaver. Picture this: toys everywhere, no space to breathe, total chaos in the playroom. I’ve been there, scrambling to tidy up after playtime.

    I put this together because I love simple hacks that actually work – no fancy tools or big budgets needed. Last year, I turned my guest room into a kid zone and tested a few of these myself. They saved my sanity, promise.

    Stick with me for 10 easy ideas that’ll fit any room. You’ll get step-by-step vibes, real talk on what works, and embeds to see them in action. Your space will feel magical, not messy.

    10 DIY Stuffed Animal Storage Ideas That’ll Tame the Toy Chaos

    Bookshelf Toy Overflow Fix

    This setup with bookshelves crammed full of plushies next to the door is genius for small spaces. I added one in my hallway – instant order. You can mix books and toys for that lived-in charm.

    Tall Bar Storage Tower

    That sleek white tower with blue bars screams warehouse chic but works perfectly in a kid’s room. Stack your favorites high and grab easy. I built a mini version from PVC pipes – cost me under $20, held 50 stuffies easy.

    Double Shelf Stuffed Stack

    Two simple shelves overflowing with animals? Yes please, it’s practical magic. Hang ’em at kid height for self-cleanup wins. My sister’s room got this upgrade – her twins love sorting their own now.

    Pro tip: label bins inside for extra fun.

    Ceiling Teddy Hammock

    Colorful hammock dangling above the bed with teddies tucked in – adorable and space-saving. I tried this over my couch for throw pillows first, then went full stuffie mode. Kids go wild picking their bedtime buddy.

    Corner Hammock Nook

    This room corner hammock is low-key brilliant for tight spots. Netting from the hardware store, hooks in the wall – done in an hour. You’ll free up floor space and add whimsy, trust.

    Built-In Bar Shelves

    Wooden shelves with metal bars recessed into the wall? Custom vibes without the contractor price. I DIY’d something similar using scrap wood – stuffies stay put, no toppling disasters. (Oops, mine wobbled once before I added brackets.)

    Perfect for playrooms or closets.

    Hanging Blue Basket Drop

    Blue baskets from the ceiling create this dreamy suspended storage. Chain or rope, thrift baskets – super cheap. I hung a few in my laundry room for odds and ends; now it’s stuffie central too.

    Window Frame Rope Hack

    Unfinished window frame turned into a rope grid for hanging toys – rustic and fun. Screws, paracord, voila. Did this for my nephew’s fort; he stuffs it full every night. Side note: measure twice, or you’ll redo like I did.

    Works anywhere with a sturdy frame.

    Wall-Mounted Plush Gallery

    Stuffed animals hanging like art on the playroom wall – who knew? Hooks or netting make it effortless. You rotate them for fresh displays; keeps things exciting without clutter buildup.

    Cage-Style Teddy Pen

    A wire cage bursting with teddies feels like a zoo exhibit but way cuter. Repurpose an old pet crate or buy cheap. I painted one pastel for my goddaughter – her favorite “prison break” game now. Total hit.

    How to Actually Make This Work For You

    Okay, real talk – start by measuring your space and sorting stuffies into keepers versus donate piles, because you don’t need 200 unicorns taking over. Pick 2-3 ideas that match your room’s vibe, like hammocks for high ceilings or shelves for walls, and use stuff from Home Depot or your garage to keep costs low – I spent maybe $50 total on mine. Involve the kids in building; it’ll make cleanup their job forever, plus it’s bonding time. Oh, and test stability first – nothing worse than a midnight stuffie avalanche. Safety first, always secure to studs or use heavy-duty hooks.

    What’s the cheapest DIY stuffed animal storage?

    Hammocks from dollar store nets or old t-shirts sewn into bags win for under $10. I’ve done both – zero regrets. Quick sew or knot, hangs anywhere.

    Can these work in a small apartment?

    Totally, go vertical with hanging baskets or wall hooks to save floor space. My tiny guest room proved it. No drilling? Command strips hold light loads fine.

    How do I get kids to use the storage?

    Make it a game – “feed the hammock” or label with their faves. My niece races to fill hers now. Fun beats nagging every time.

    Are these ideas safe for toddlers?

    Yes, if secured properly – no loose strings, firm anchors. Skip high hangs for little ones. I double-checked all mine; peace of mind.

    These DIY stuffed animal storage ideas changed my toy-taming game forever. Which one’s calling your name? Drop a comment – I’d love to hear your tweaks!

  • 15 Fun Diy Stuffed Animal Storage For Beginners This Year

    15 Fun Diy Stuffed Animal Storage For Beginners This Year

    Hey girl, if you’re drowning in stuffed animals like I was last year with my niece’s endless collection, DIY stuffed animal storage for beginners is your new best friend. I remember stepping on that one rogue unicorn in the dark – total nightmare. These simple hacks turned our chaos into cute organization real quick.

    I put this together because I’ve been there, fumbling with kid clutter while trying to keep the house semi-sane. Last summer, I whipped up a few of these for my sister’s playroom, and it was shockingly easy – no power tools, just stuff from the dollar store. Even if you’re craft-averse like me, you’ll nail it.

    Stick around for 15 fun DIY stuffed animal storage ideas that are total beginner wins. You’ll get step-free inspo, my messy trial-and-error stories, and tips to make ’em last. Your kid’s room is about to feel like a Pinterest dream – promise.

    15 DIY Stuffed Animal Storage Ideas You’ll Wish You Tried Sooner

    Pink Piano Plush Shelf

    This sweet shelf setup in front of a pink piano is pure magic for little musicians. I love how the stuffed animals peek out like they’re jamming along. Tried something similar for my niece – hot glued dollar-store bins right onto an old shelf, and boom, instant display that hides the mess.

    Wire Rack Wall Zoo

    Who knew a simple wire rack could hold a whole plush army behind it? It’s like a secret zoo on the wall – super space-saving. I grabbed one from the garage sale for $5, zip-tied nets inside, and my nephew’s room went from floor dump to organized in an afternoon.

    Closet Door Plush Hangout

    Stuffed animals chilling right on the closet doors? Genius for tiny rooms. You just need command hooks and some fabric pockets – I sewed mine wonky on the machine, but they hold like champs. Kids grab their faves without tearing the place apart.

    Simple White Plush Cubby

    A clean white shelf stuffed with buddies – minimal but so effective. Perfect starter project if you’re overthinking it. I painted an old bookcase white, added bins, done. No perfection needed; my version’s a bit chipped now, adds character.

    Budget Rack Plush Holder

    This rack screams deal at under $4 vibes – easy DIY dupe with wire and wood. Hang it low for easy access. I built one from scrap lumber and chicken wire; cost me nothing, and it tamed 50+ stuffies overnight.

    Princess Headband Plush Nook

    Pink princess headband ties into this cute plush corner perfectly. Soft and girly storage that feels like playtime. Repurposed a headboard with netting – my girlfriend’s daughter squealed when we surprised her. Total win, even if the netting sags a tad.

    Floor-Level Plush Wall

    Kid lounging in front of a stuffed wall? Dreamy reading spot setup. I hung clear shower pockets on the wall – cheap, see-through, no digging required. He spends hours picking pals now instead of chaos hunting.

    Twinkly Hammock Plush Swing

    Hammock with lights and tassels holding stuffies – cozy overload. String lights make it bedtime magic. I knotted a cheap hammock to the ceiling fan base (shh, don’t tell), added fairy lights. Kids fight over “their” hammock spot now.

    Clean Closet Plush Line

    Red-and-white lines next to closet scream organized potential. Simple hooks along the wall do the trick. Pounded in cup hooks, draped old scarves as nets – my quick fix after a yard sale haul of stuffies. Works like a charm, zero fancy skills.

    Ceiling Basket Plush Drop

    Basket dangling from the ceiling over the bed – vertical space hack. Stuffies become dreamy canopy friends. Used a thrift basket, paracord from Amazon, ceiling screw. My niece sleeps better with her crew overhead; I bump it sometimes tho, ha.

    Built-In Bar Plush Shelf

    Wooden shelf with metal bars built into the wall – sturdy and custom. Great for heavy plush loads. I faked it with plywood and tension rods; no drywall damage. Holds my godson’s dinosaur squad perfectly.

    Colorful Rainbow Plush Rack

    Pop of color on this shelf packed with stuffies. Makes organizing fun, not a chore. Painted spice racks in rainbow hues – dollar store score. You can mix/match colors to match any room vibe.

    Hanging Wall Plush Parade

    Stuffies marching up the wall on hooks – bold and playful. Easy to swap out faves. I used S-hooks on a pegboard; kiddo rearranges daily like it’s her gallery. Zero floor space stolen.

    Rocket Bed Plush Perch

    Rocket ship bed with overhead shelf for space explorers. Themed storage that’s out-of-this-world. Stacked crates under the bed frame for mine – painted starry. Little guy thinks his bears are astronauts now.

    Lighted Ceiling Plush Basket

    Basket from the ceiling wrapped in string lights – glowy plush heaven. Romantic even for kids’ rooms. Same as the other basket but with extra sparkle; I added battery lights since outlets are tricky. Nightlight vibes without the bulk.

    How to Actually Make This Work For You

    Okay, real talk – start by measuring your chaos zone, like that corner where stuffies avalanche daily, and pick one idea that fits the space without overhauling everything. Grab basics like command hooks, netting or cheap baskets from Target dollar spot – they’re forgiving for beginners and peel off clean if you mess up. Test small, like hanging three stuffies first to see if your kid digs it, then scale up; I learned the hard way when my first rack sagged under 20 pounds, oops. Layer in lights or colors last for that wow factor, and involve the kids so they actually use it – my niece “helps” and now tidies up herself. Oh, and rotate stuffies seasonally to keep it fresh; prevents overwhelm.

    What materials do I need for beginner DIY stuffed animal storage?

    You’ll want command hooks or screws, netting or fabric, cheap baskets or wire racks – all under $20 total. Dollar stores have gems like shower curtains for hammocks. Start with no-sew options if needles scare you.

    How do I hang stuff without damaging walls?

    Command hooks or 3M strips are lifesavers for renters like me. For heavier loads, use tension rods between walls. Test weight first – I overloaded once and replastered, yikes.

    Can these ideas work for small rooms?

    Totally – go vertical with ceiling baskets or door pockets to free floor space. Wall hammocks are magic for tight spots. My sister’s 8×10 playroom transformed overnight.

    How often should I reorganize the storage?

    Every few months, or when stuffies pile up again. Let kids choose faves to rotate. Keeps it fun and prevents forgotten toys in the back.